UDM-Pro and Apple Homekit mDNS Configuration
UDM-Pro and Apple Homekit mDNS Configuration
The UDM-Pro is an impressive piece of networking hardware. However, Ubiquiti has moved away from some of the internals present in their USG, and as such a few things aren't working quite as expected; one of those being the mDNS Reflector.
If you're using a separate network and VLAN for your IoT devices, which you should be if you're not, you will need to setup an mDNS reflector to allow for discovery and communication between those devices and those on your primary network. This helps keep your primary network more secure, as well as giving you opportunities to lock down your IoT VLAN and prevent rogue devices from gaining more access than they need.
UniFi has a built-in mDNS Service that uses Avahi behind the scenes. However, the functionality does not appear to work as expected on the UDM-Pro (opposed to the USG, which seems to work as advertised). To properly configure the UDM-Pro, some work is needed.
This guide assumes you already have your networks (primary, VLAN, etc) and WiFI networks already configured, in addition to firewall rules between them for standard access. vNinja.net has a great write-up on this already; though, I will probably write up my own guide after I finalize my own personal network.
Configuring UniFi Services
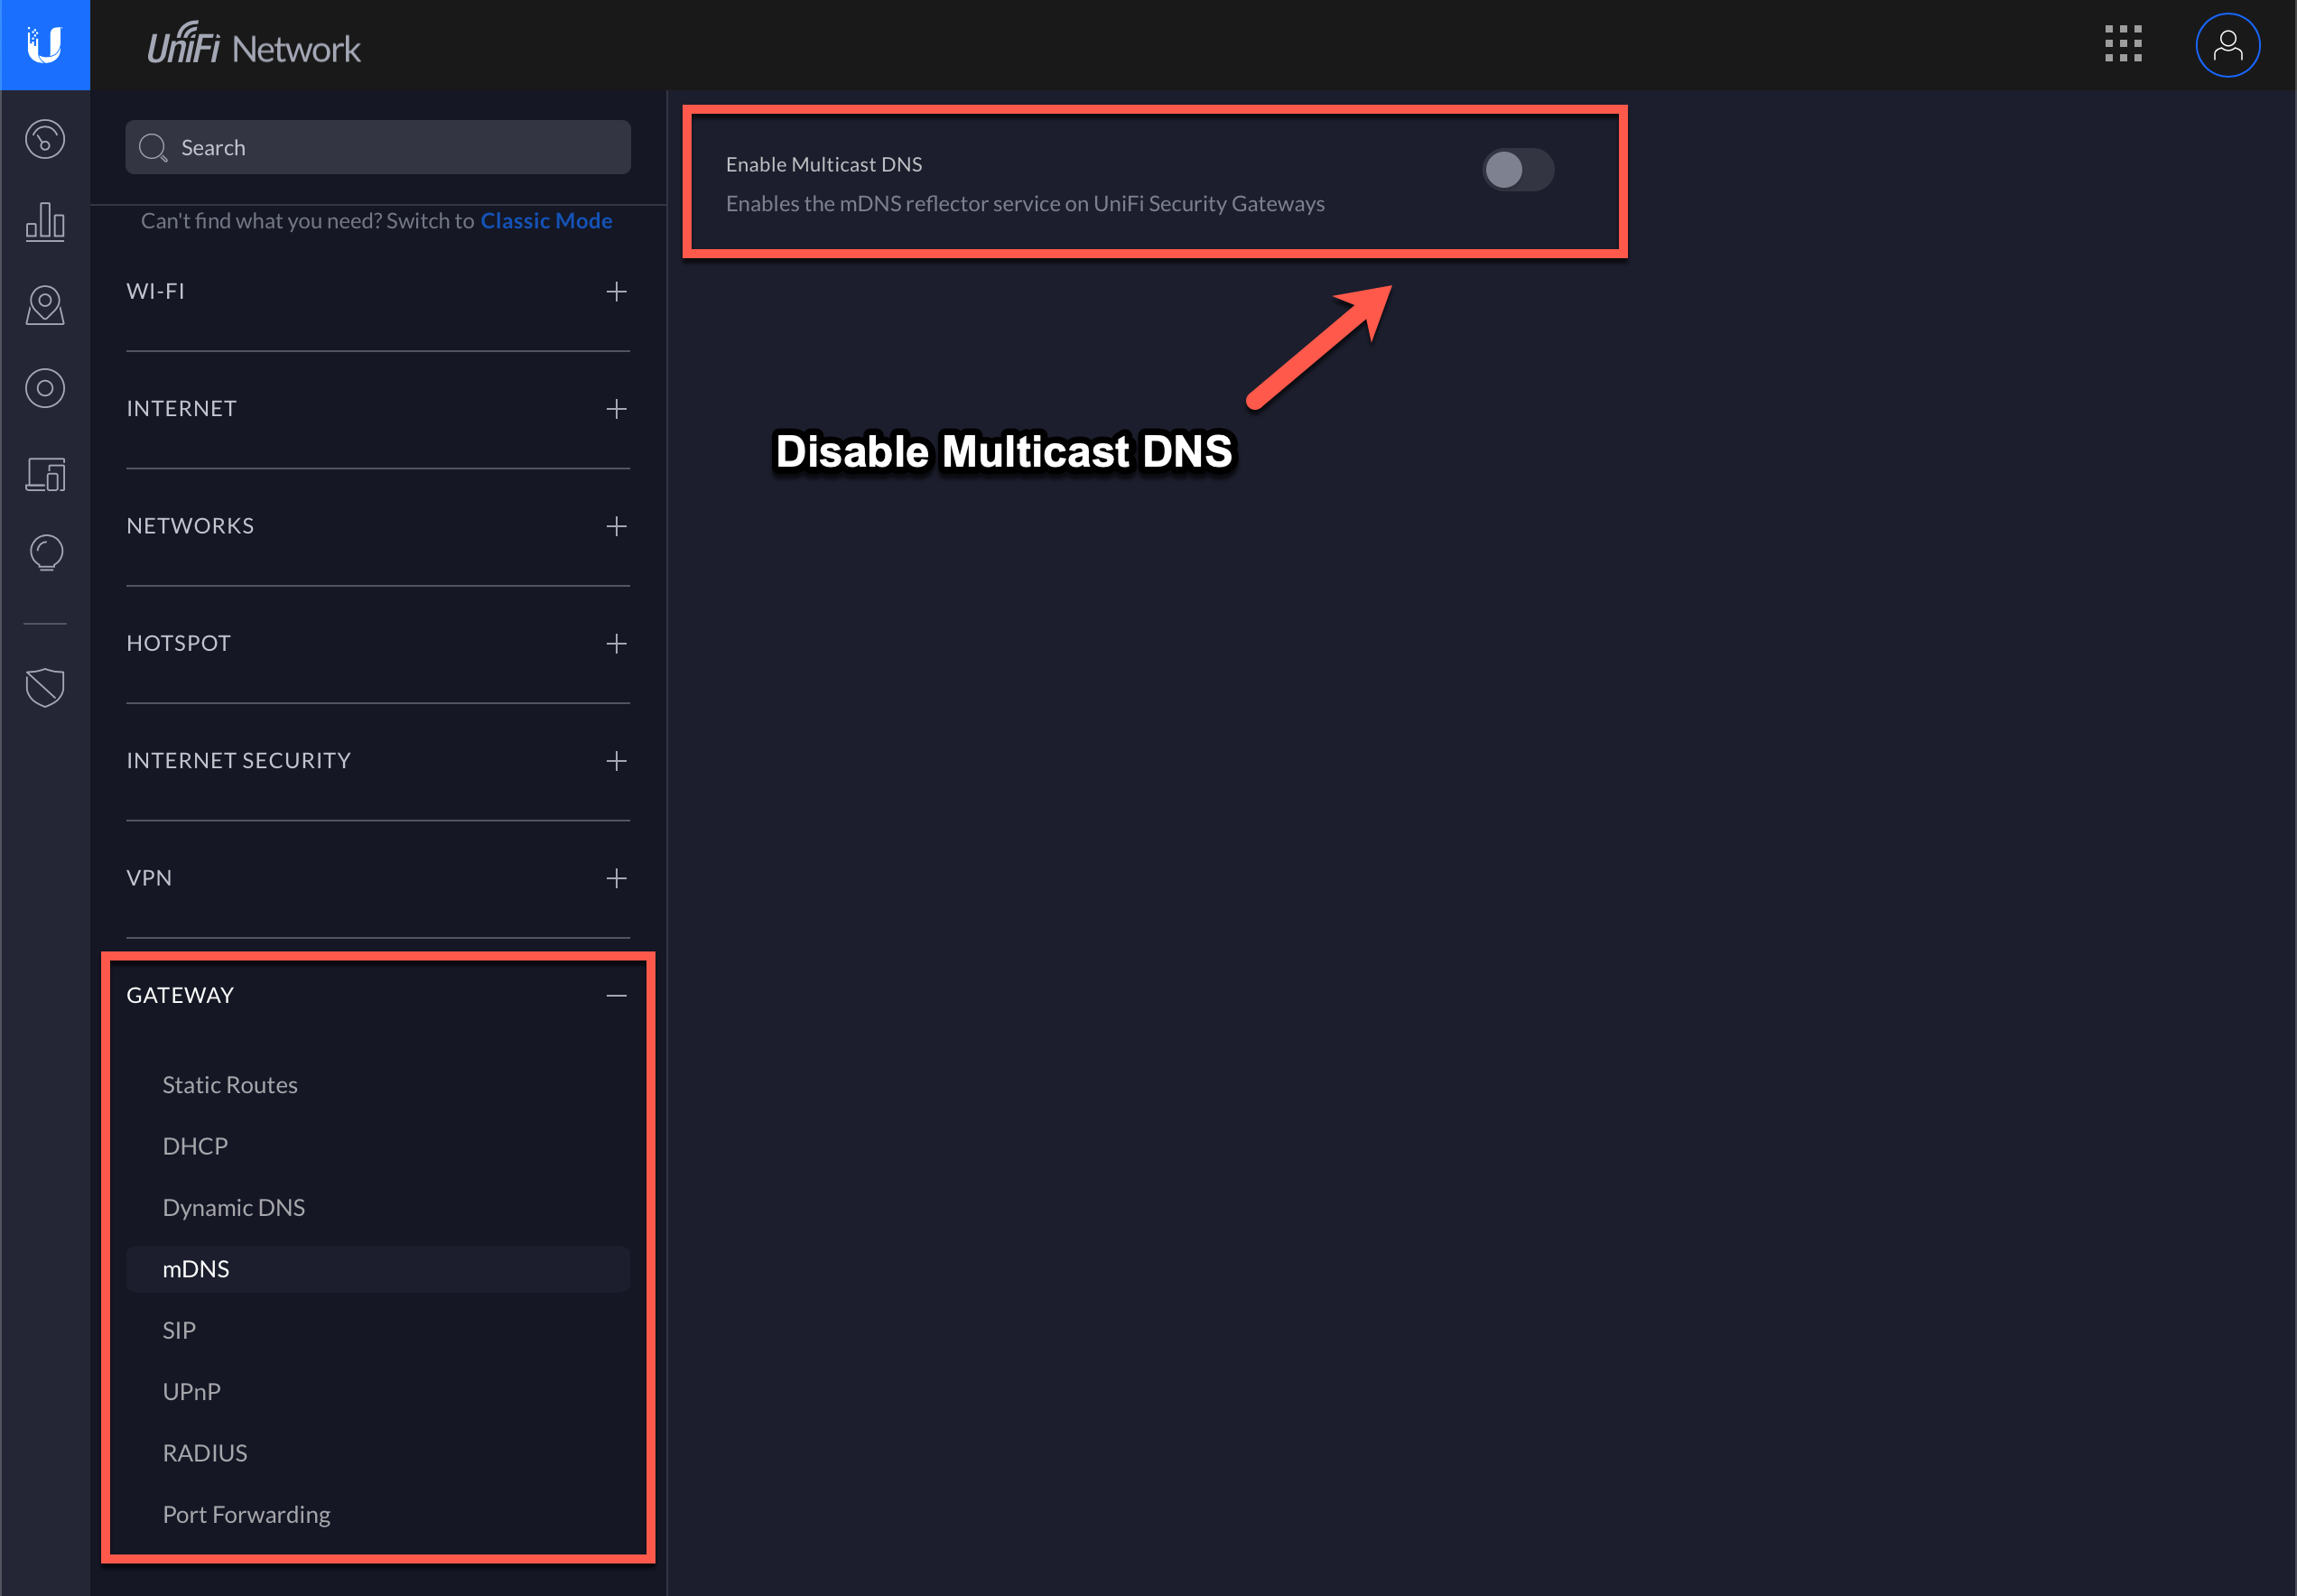
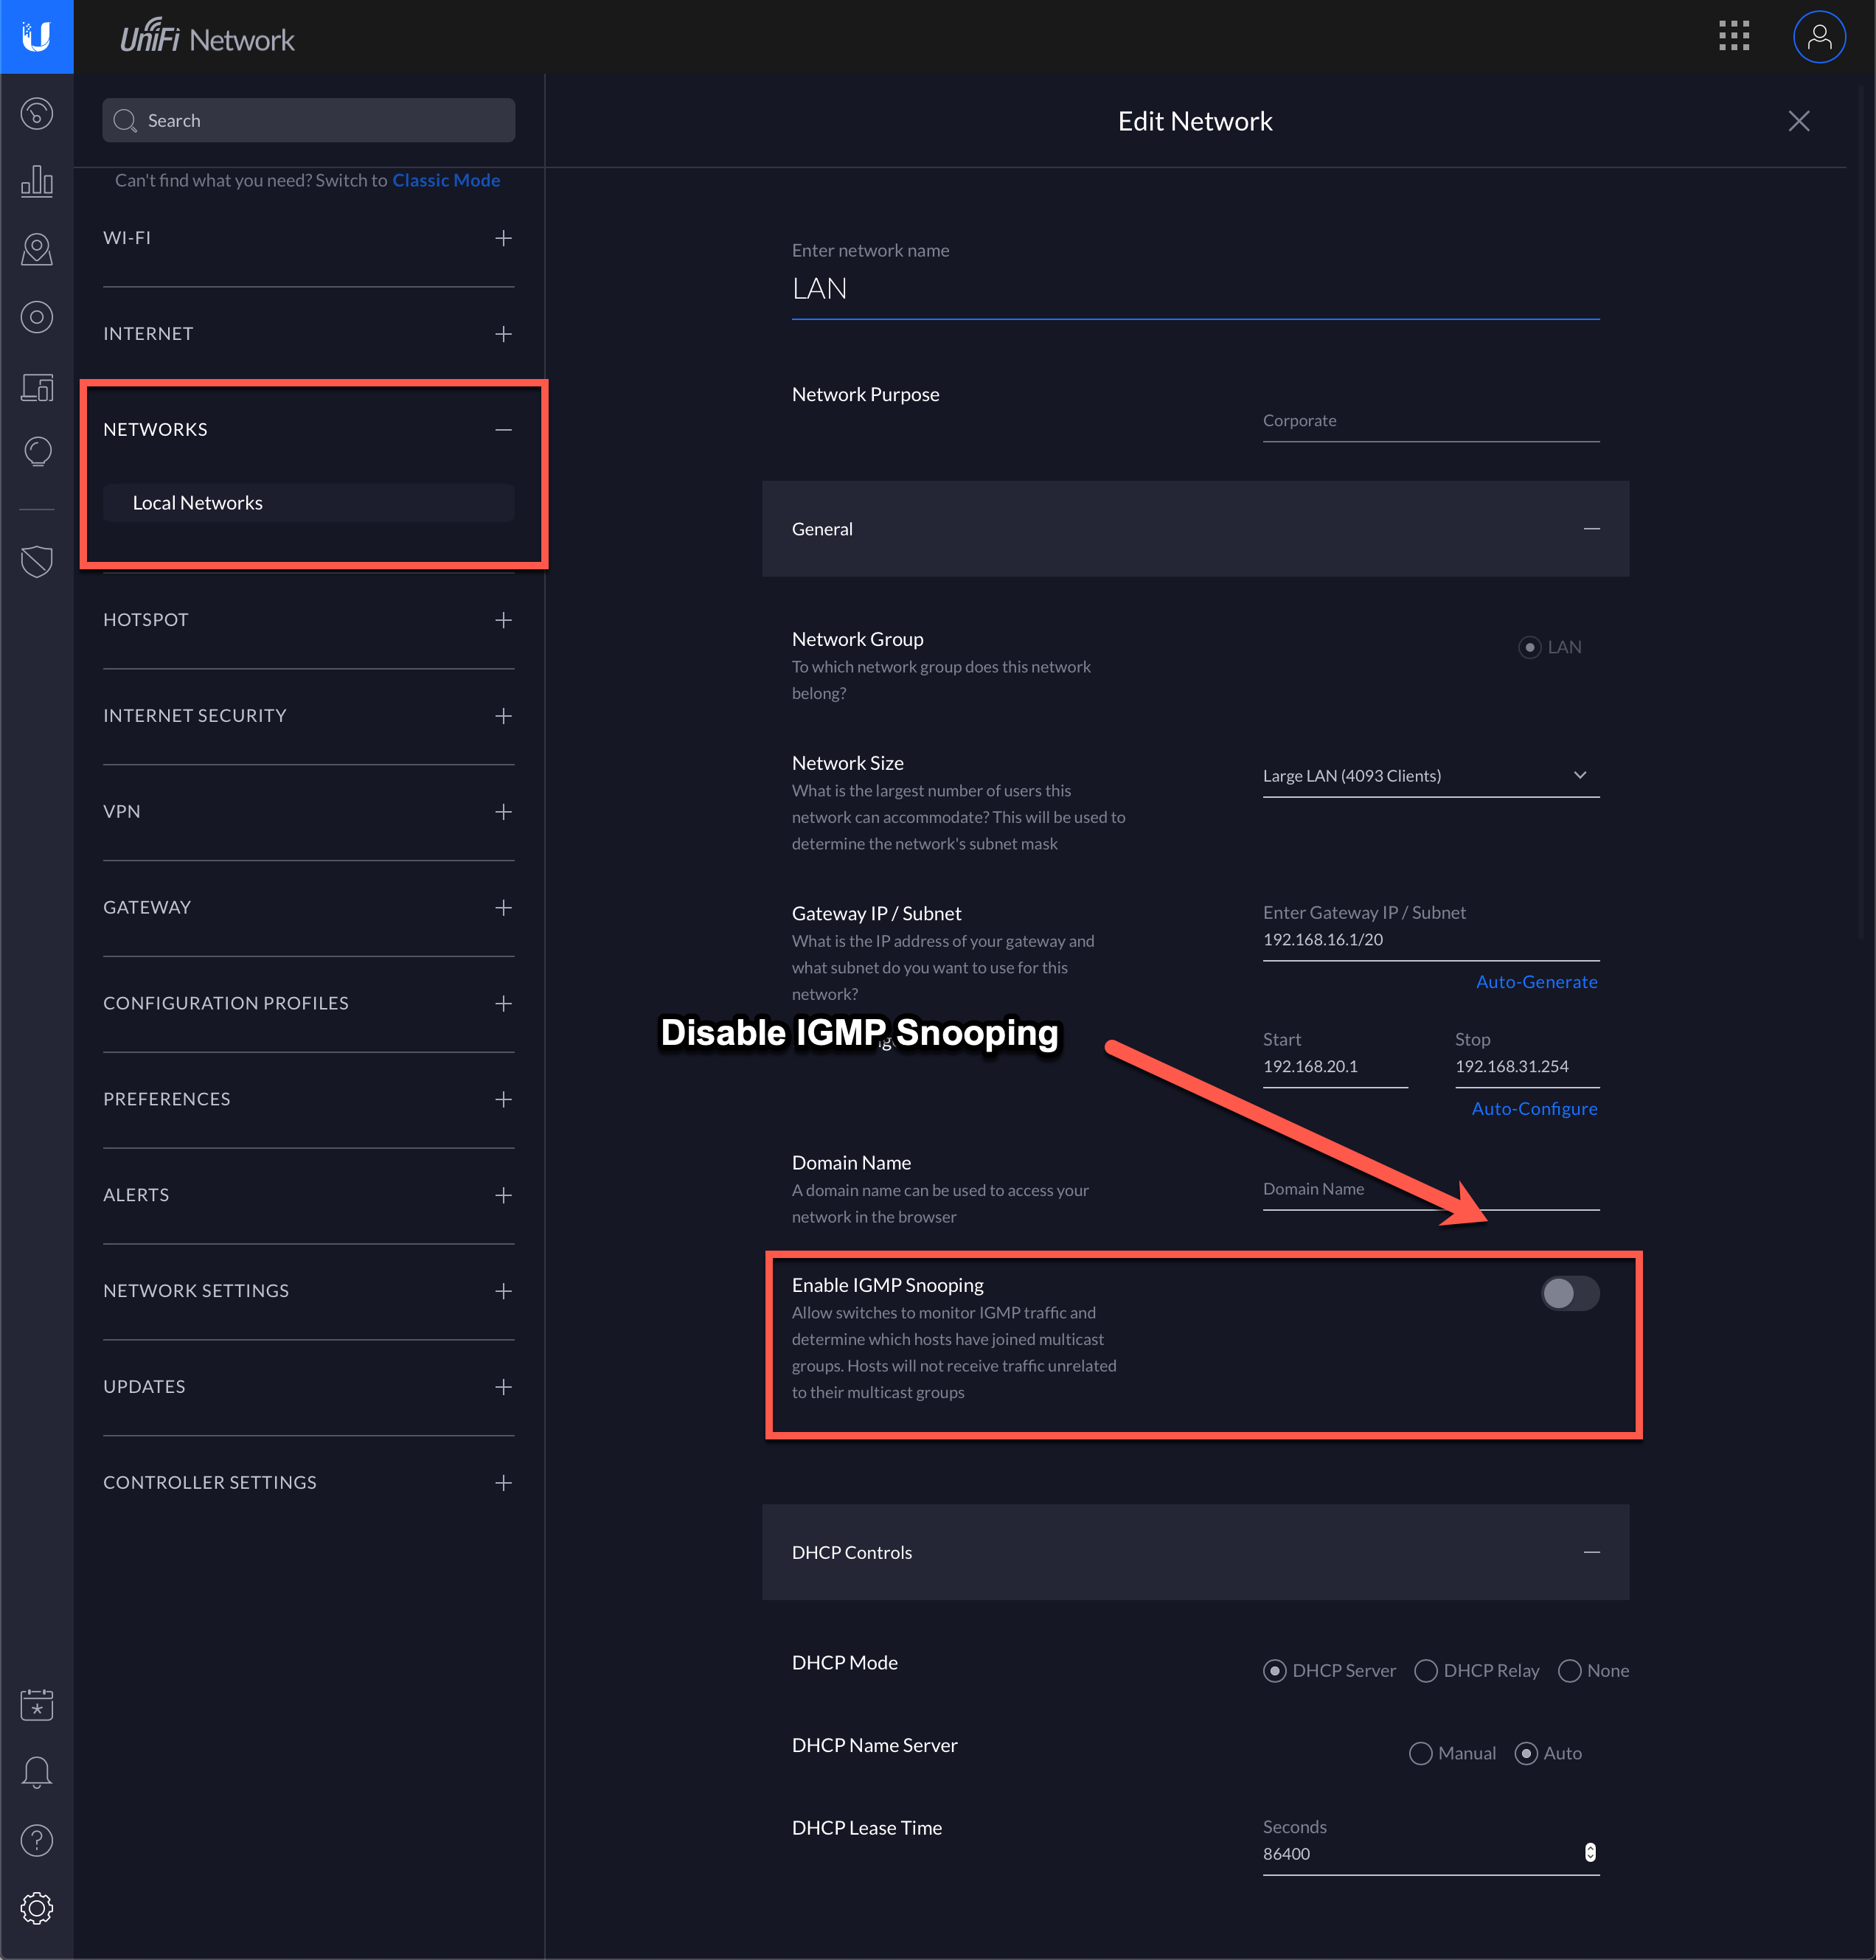
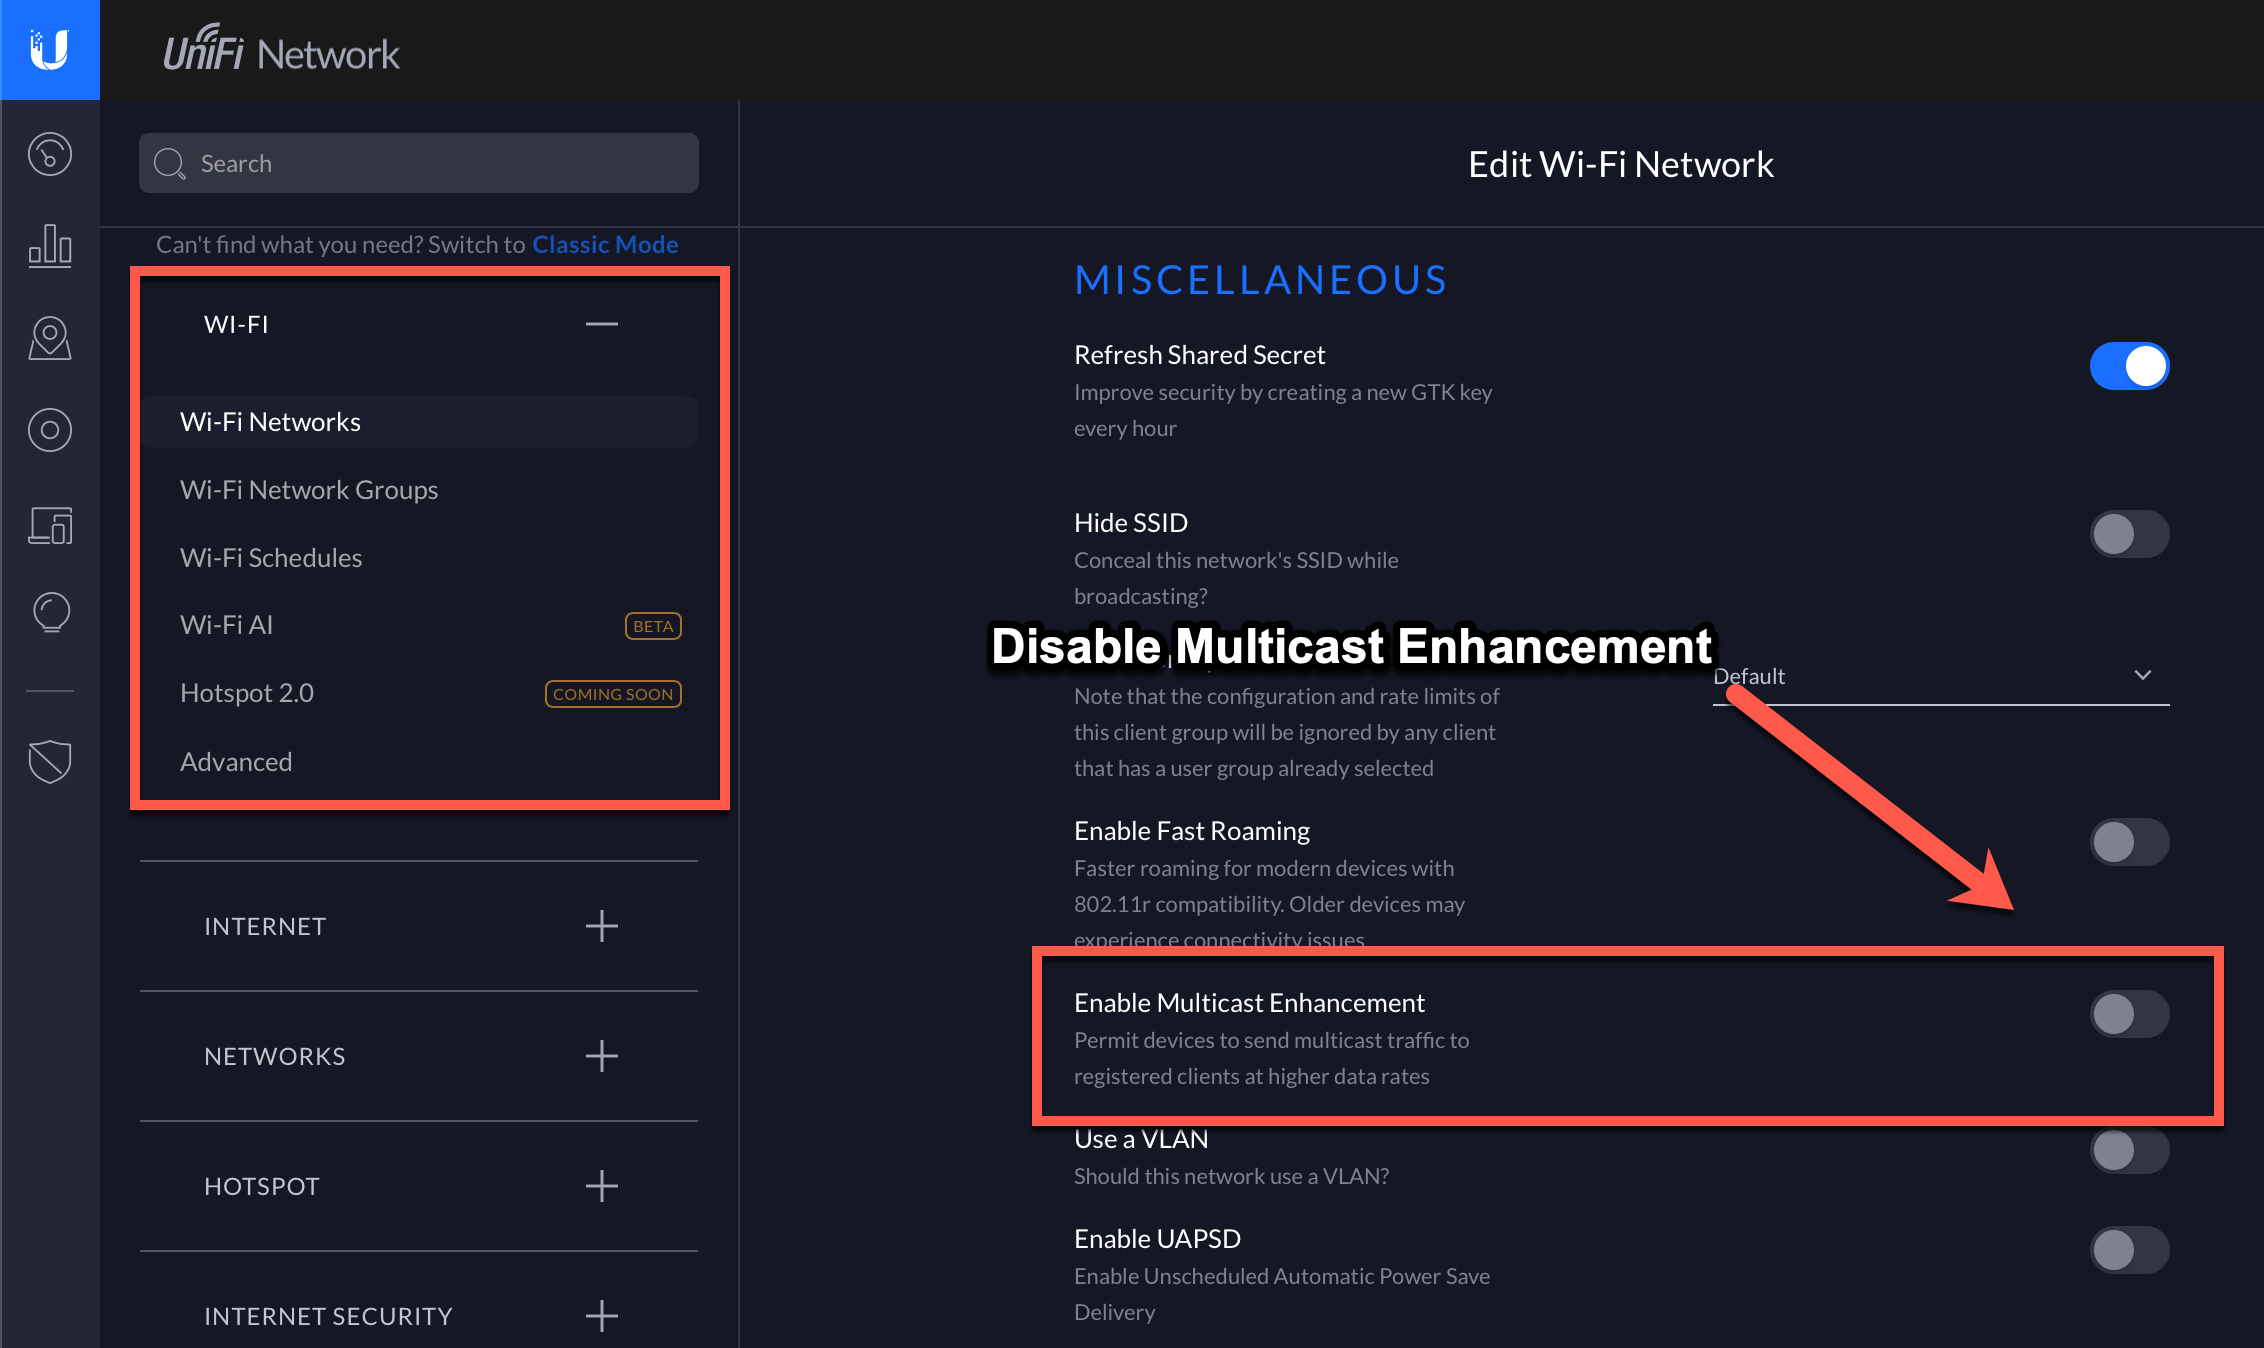
Before we apply our custom configuration, we need to disable some of the built-in UniFi services and configuration. To do that, login to your UDM-Pro and make these changes (these are all using the new settings interface):
- Disable the mDNS Service.

- Disable IGMP Snooping on all network that will utilize mDNS (your primary LAN
and IoT LAN at a minimum).

- Disable Multicast Enhancement on all wireless networks that will utilize mDNS
(primary WLAN and IoT WLAN at a minimum).

Next, we'll login to the UDM-Pro using SSH and install a few custom services.
Installing a Custom mDNS Reflector
If you haven't configured your UDM-Pro for SSH, do that first.
Now we can install our custom mDNS Reflector.
SSH into the UDM-Pro.
ssh root@192.168.1.1 # or whatever your controller's IP address isLog into the UniFi OS Shell.
unifi-os shellInstall on-boot-script from udm-utilities.
curl -L https://raw.githubusercontent.com/boostchicken/udm-utilities/master/on-boot-script/packages/udm-boot_1.0.1-1_all.deb -o udm-boot_1.0.1-1_all.deb
dpkg -i udm-boot_1.0.1-1_all.deb
exit
Pull the
multicast-relaydocker image and create a container. Notice the usage ofpodmanversus the standarddockerCLI.podman run -it -d --restart=always --name="multicast-relay" --network=host -e OPTS=" --verbose" -e INTERFACES="br0 br2" docker.io/scyto/multicast-relayNote the
br0 br2parameter; this should match your VLAN's network interfaces. Executeifconfigfrom the SSH session to see available interfaces; add your VLANs as space-delimited entries to the command.Add a startup script to re-execute the container on startup.
touch 01-multicast-relay.sh
chmod +x 01-multicast-relay.sh
Then use
vim 01-multicast-relay.shto edit the file. Hitito enter edit mode, paste the following contents, then hitescand:wto save the file. Enter:qto quit.#!/bin/sh # kill all instances of avahi-daemon (UDM spins an instance up even with mDNS services disabled) killall avahi-daemon # start the multicast-relay container image podman start multicast-relayReboot the UDM and test your HomeKit devices.
Conclusion
After following these steps, you should be able to use your HomeKit devices segregated by a VLAN. In my personal setup, I have my hub (an AppleTV 4th Generation) on the primary LAN, with all of my IoT devices in the VLAN. I'm able to control them all directly with no issues now. Additionally, Chromecast devices work a majority of the time, though they appear to be occasionally limited due to UPnP being disabled.
Ideally, the built-in mDNS service should be good enough for what we need. However, until Ubiquiti fixes their mDNS service, this custom workaround will be required.
A huge thank you to u/CaoCamp who wrote the initial solution, based on the work by u/boostchicken and u/scytob. I simply filled in some blanks based on my own experience.
References
- GitHub | UDM Utilities by boostchicken
- Ubiquiti Community | [UDM][UDMP] IoT VLAN Speaker Group fix with mDNS and Google Nest Speakers/Chromecasts
- Reddit | r/Ubiquiti | mDNS not working properly on UDM